Getting Started in Make Bikes
From spawn to your first sold bike without wasting the opening hour.
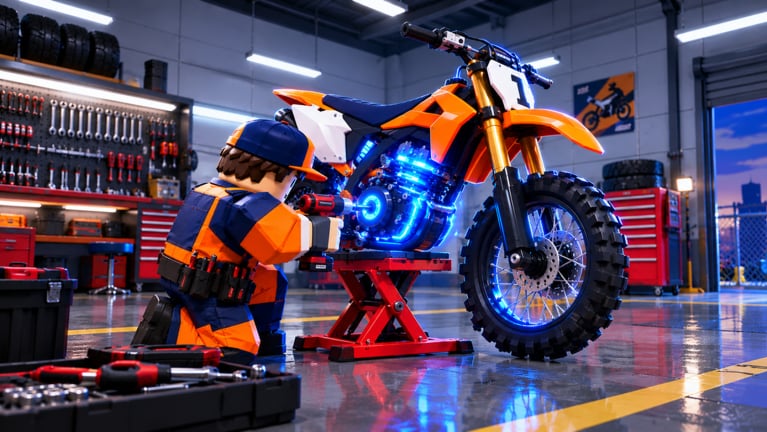
Make Bikes by Make it Interactive is a Roblox workshop tycoon: order crates, assemble bikes at the bay, paint them, sell to buyers, hire staff, then ride Highway, Sand Dunes, Timber Ridge, and the MX Track for wheelies, tricks, and combos. Servers hold up to eight players, and the experience released in October 2026. This guide covers the first hour so you leave spawn with cash flowing instead of an empty bay and a half-read tutorial.
If you only remember three rules: redeem FIRSTGEAR early, finish one full assemble-paint-sell cycle before long rides, and treat starter goals as a checklist rather than optional flavor text. Deeper systems live in sibling pages—How to Make Money, How to Build Bikes, Crates and Parts, Rebirth and Workshop, and Riding and Tricks—but none of those matter until the first sale lands.
Spawn and workshop orientation
Join from the Roblox experience page and spawn into your workshop space. Take thirty seconds to locate the crate order point, the assembly bay, the paint station, the sell or buyer handoff area, and the exit toward the riding maps. You do not need every room unlocked on day one. You need a clear path from crate to bay to paint to cash. If the UI highlights starter goals, keep that panel visible; those prompts exist to force the core loop once before you freestyle.
Walk the bay empty once. Note where unfinished frames sit, where completed bikes wait, and where staff will later stand. Early confusion usually comes from dropping parts in the wrong spot or leaving a bike half-painted while you chase a map. Orientation now saves two restarts later.
Starter goals: clear them on purpose
Starter goals teach the economy in order. Typical early tasks push you to open a crate, place parts on the bay, finish a bike, apply paint, and complete a sale. Do them in sequence even if you already know tycoon games. Skipping ahead often locks a goal that expected an earlier state, which wastes time when you are still learning menus.
Treat each goal as a micro-contract: read the requirement, do only that action, confirm completion, then move on. If a goal mentions group or social rewards, handle the free gift path once—like the group if the game offers a free gift for it—then return to the bay. Social rewards are free value, but they should not interrupt a bike mid-assembly.
Redeem FIRSTGEAR before you buy crates
Open the codes hub and redeem FIRSTGEAR as soon as the code UI is available. The reward is a free crate, which is the best possible early gift because crates are the main source of parts, including rare and mutated rolls later. Enter the code exactly, claim the crate, and open it before spending cash on extra orders.
If the code fails, check for typos, spacing, and whether you already redeemed it on the account. Do not burn starting cash on duplicate crates until FIRSTGEAR is resolved. Fresh codes and redemption steps always live on the codes page; bookmark it for later drops.
First crate to first build
Open the free crate and sort what you receive. Keep usable frames, wheels, engines, and cosmetics where you can see them. Junk that cannot mount yet can wait in inventory, but do not bury the pieces you need for a complete bike. Full inventory habits are covered in Crates and Parts; for hour one, your only job is one rideable, sellable bike.
Move to the assembly bay. Mount core parts first—structure and drivetrain—then finish with wheels and any required fittings so the bike registers as complete. Avoid starting a second frame until the first one can leave the bay. Parallel builds look productive and usually create dead time at paint or sell.
Paint, light tune, and the first sale
Take the finished bike to paint. Early paint is about completing the workflow and meeting buyer expectations, not chasing a perfect livery. Pick a clean colorway, confirm the paint step finishes, then check whether a light tune option is available without draining your cash. Save deep customisation for later sessions when you understand which setups sell faster; How to Build Bikes and the best builds list help once you have baseline income.
Hand the bike to the buyer or sell station promptly. Watch the cash tick up and note how long the buyer interaction took. That timing matters when you hire staff later: idle finished bikes are lost throughput. After the sale, glance at starter goals again and clear any remaining sell-related tasks.
When to ride in the first hour
Riding earns cash through wheelies, tricks, and combos on Highway, Sand Dunes, Timber Ridge, and the MX Track. It is tempting to leave the moment you spawn. Resist until you have sold at least one bike and understand how to restock a crate. A short ride after the first sale is perfect: take a tuned or leftover bike, run one map for combo practice, bank the riding cash, and return to order the next crate.
If the bay is empty and staff are not hired yet, long map sessions stall the workshop. Use Riding and Tricks for map choice and combo tips, and How to Make Money for when riding beats another sell cycle. In hour one, riding is a bonus loop, not the main job.
First-hour checklist
- Spawn and locate crate, bay, paint, sell, and map exit.
- Open starter goals and keep them on screen.
- Redeem FIRSTGEAR via the codes flow and open the free crate.
- Assemble one complete bike; do not start a second frame early.
- Paint, optional light tune, then sell immediately.
- Claim any group like free gift if offered, without abandoning a mid-build bike.
- Take one short ride for tricks and combos, then return to order the next crate.
- Skim Guides Hub and queue How to Make Money for session two.
What to ignore on day one
Skip rebirth planning until cash and staff feel stable—Rebirth and Workshop explains timber shed through Godspeed Gold looks when you are ready. Skip chasing every rare part on sight; catalogue drops and compare later on best parts and the wider tier list. Skip script rabbit holes until the natural loop is comfortable; if you use helpers at all, read scripts carefully. Patch notes on updates matter after you know the baseline loop.
Finish hour one with at least one sold bike, FIRSTGEAR claimed, starter goals cleared or nearly cleared, and a mental map of the workshop. That foundation makes every other guide on this wiki pay off faster. For a glossary-style overview of systems, keep the wiki overview handy, and browse players if you want creator or community context while you grind.
Frequently Asked Questions
Quick answers for Make Bikes players.
What is the FIRSTGEAR code in Make Bikes?
FIRSTGEAR is an active promo code that grants a free crate. Redeem it from the in-game code UI as early as possible, then open the crate before buying more stock. See the Codes hub for current status.
Should I ride maps before selling my first bike?
No. Complete one assemble-paint-sell cycle first so you understand the workshop loop and have cash flowing. Take a short ride afterward for tricks and combos, then return to order crates.
What are starter goals for?
Starter goals force the core workflow in order: crate, build, paint, sell, and related onboarding steps. Clear them deliberately so you do not soft-lock a prompt mid-session.
Is there a free gift for liking the group?
Make Bikes offers a free gift path tied to group like engagement. Claim it once when convenient, but do not abandon a bike on the bay to do social steps.
How many players are in a Make Bikes server?
Servers support a maximum of eight players. You still manage your own workshop loop while sharing the world and riding maps with others.
What should I read after Getting Started?
Open How to Make Money if cash is slow, How to Build Bikes and Crates and Parts to tighten the bay loop, then Riding and Tricks and Rebirth and Workshop as you scale.